Your first route
In this guide you create your first route step by step — from the empty overview to a running data transfer. As an example we export items from SAP Business One to a web shop. At the end the route runs on its own, and you know how to tell it is working.
Plan for about 10 minutes. You need no prior knowledge — just the Xchange interface open. If you don't have it open yet: Working with Xchange shows how to open it in the SAP Business One Web Client.
One principle up front: your changes do not take effect immediately. Everything you create first goes into a draft. Only when you activate it at the end does Xchange put the route into operation. So you can work in peace without breaking anything.
What you need
For this example you need an existing connection to the web shop the items should go to. A connection describes where Xchange connects to (address and credentials).
If the list is empty at the later "choose connection" step, create a connection first — it only takes a few minutes: → Create a connection. Then come back here.
Create the route
- Open the Routes page on the left and click New route (top right).
- Enter a Name that shows the object type, direction, and target system — here
Artikel-Export Webshop. (For why this form, see the Routes reference.) - Choose the Direction Export — the data flows out of SAP Business One.
- Choose the Type Processing — the regular case, where Xchange prepares and transfers the data.
- The Data origin on an export route is fixed at Dataset — the route reads its records from SAP Business One itself. It is already selected.
- Choose the Object type Artikel from the suggestion list — the kind of business data the route transfers.
- Choose the Connection to your web shop.
- Click Create.
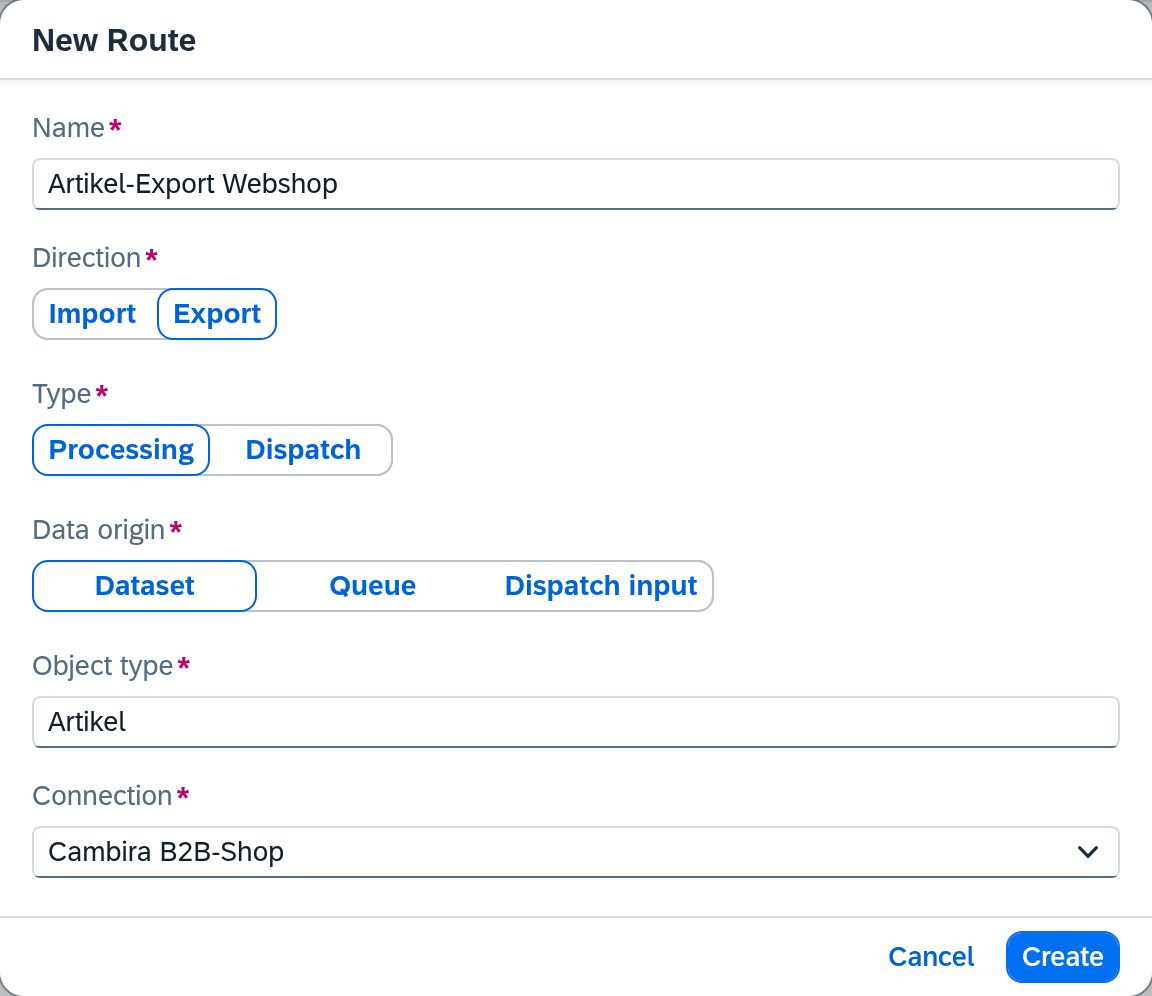
The route is created as a draft and the editor opens. Direction, type, data origin, and object type are now fixed; name and connection can be changed at any time.
The editor is divided into several tabs — General, Source data, Mapping, and Automation. Their order follows the train of thought: what the route is, where it reads from, how it maps, when it runs. You can fill them in any order; this guide goes through them from left to right. You don't need to save anything by hand: Xchange saves every entry automatically. The footer at the bottom shows "Saving…" and then "Last saved at HH:MM". You can leave the editor at any time and continue later without losing anything.
More on the fields and the other direction/type combinations is in the guide Create a route.
General
The first tab, General, shows what you defined when creating the route. It is already fully filled in: you can still change the name and connection here if needed, while direction, type, data origin, and object type are fixed. For your first route there is nothing more to do here — move straight on to the next tab.
Set the source data
In the Source data tab you determine where the route gets its data from and how it prepares the records from it. For your first route two entries are enough.
Fetch endpoint. At the top, under Data source, enter the Fetch endpoint — the place in SAP Business One the items are read from. For items that is Items. Without it the route doesn't know what to export; on an export route it is therefore required.
Change filter. For an incremental run to transfer only the changes, Xchange has to detect what changed since the last run. The Change filter further down handles that. Xchange suggests it automatically as soon as the fetch endpoint provides a change date (for items the field UpdateDate). Expand it once and check that the suggested field fits — you can change it at any time.
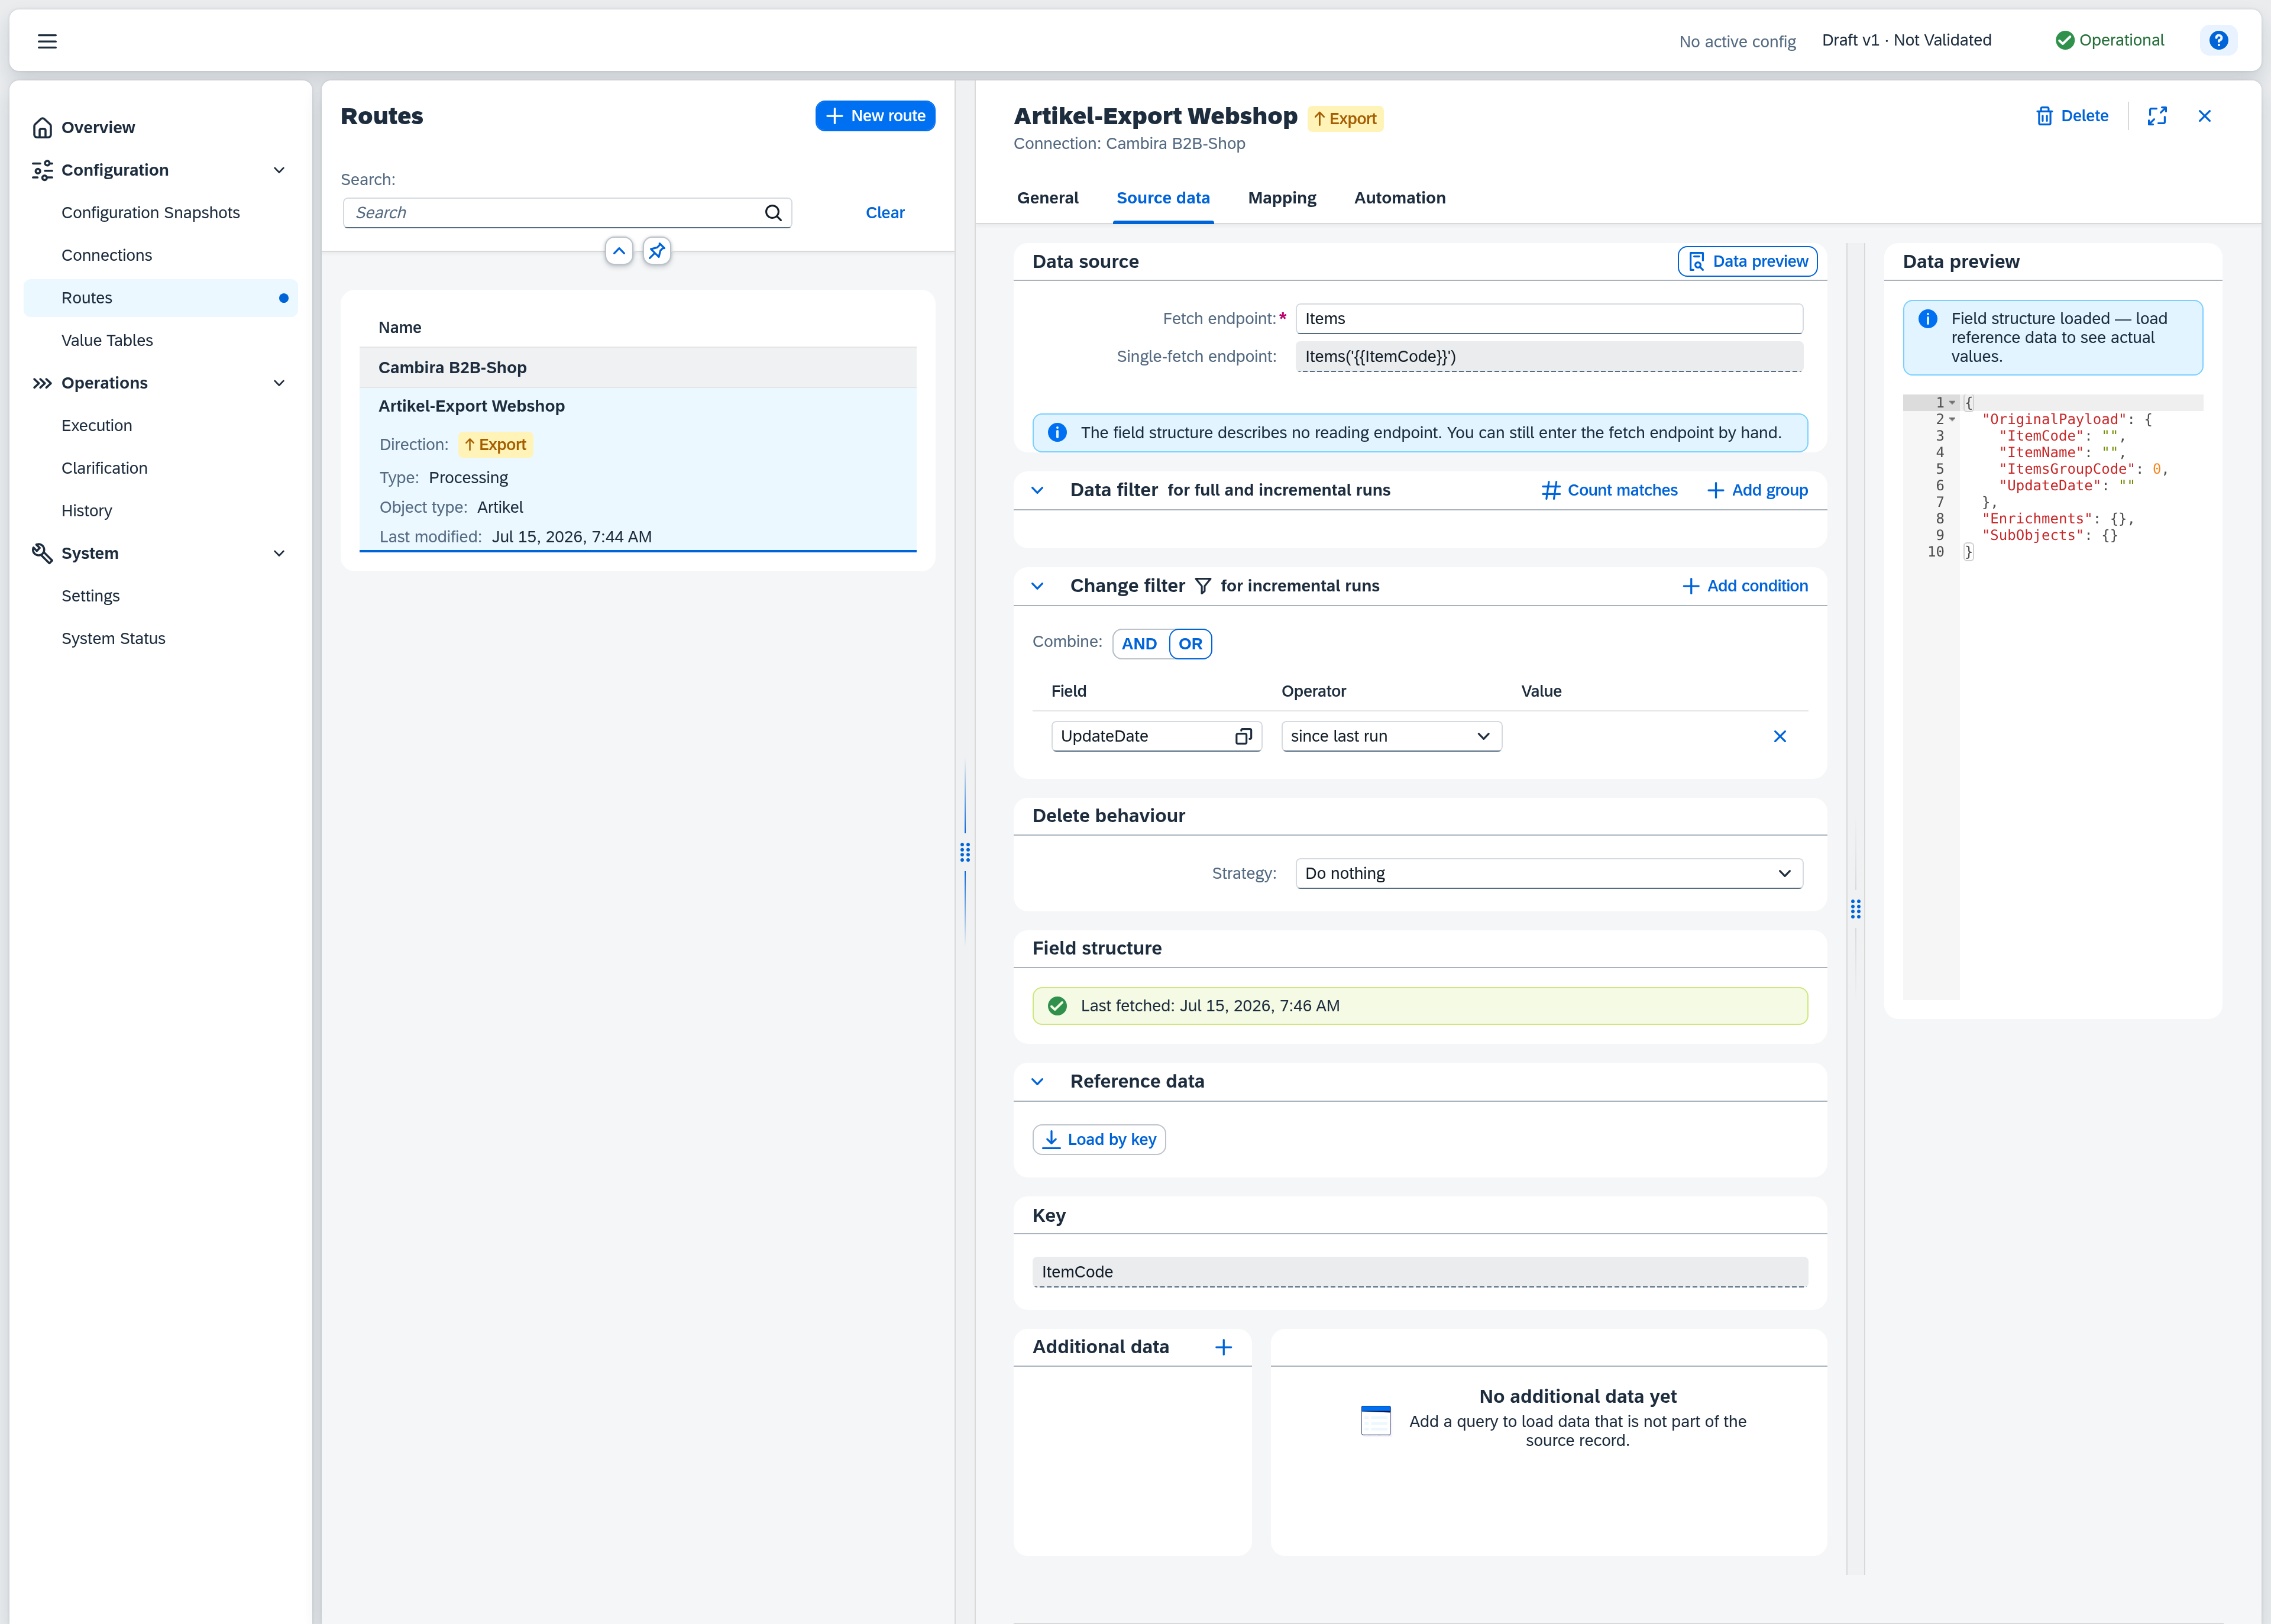
The field structure below it is worth a glance too: it shows the fields that will be available in the mapping next. Via the Data preview on the right you can load a real sample record and check the values.
The remaining areas are explained in the source data reference.
Define the mapping
In the Mapping tab you determine which SAP field maps to which field in the target system — the heart of the data exchange. A first step and an empty mapping row inside it are already created.
For the target-field picker to offer your web shop's fields, Xchange has to know the target structure. On an export route you supply it once: open the step via the gear icon, switch to the Target structure tab, and paste a sample message of your target system under Reference data. Via Generate mappings Xchange can even derive the matching rows from it directly. The mapping reference shows both ways.
You fill in the row like this:
- In the first row, choose the Target field — the field in the target system to be filled. Don't type it out: use the selection icon in the field to open a searchable list of the target fields — the fields from the target structure you just supplied — and pick the right one.
- Leave the Source type on Path (the default) — this pulls the value from a SAP field. (Use Constant to enter a fixed value instead.)
- Choose the Source — the SAP field whose value is transferred, e.g. the item number. Here too the selection list via the icon in the field helps you; the fields offered are those from the fetch endpoint — the same ones you see as the field structure in the Source data tab.
For each additional field — such as the description or the sales unit — click Add Row and repeat steps 1 to 3. Each row needs at least a target field and a source. You only need several steps for more complex mappings; for the first route the one is enough.
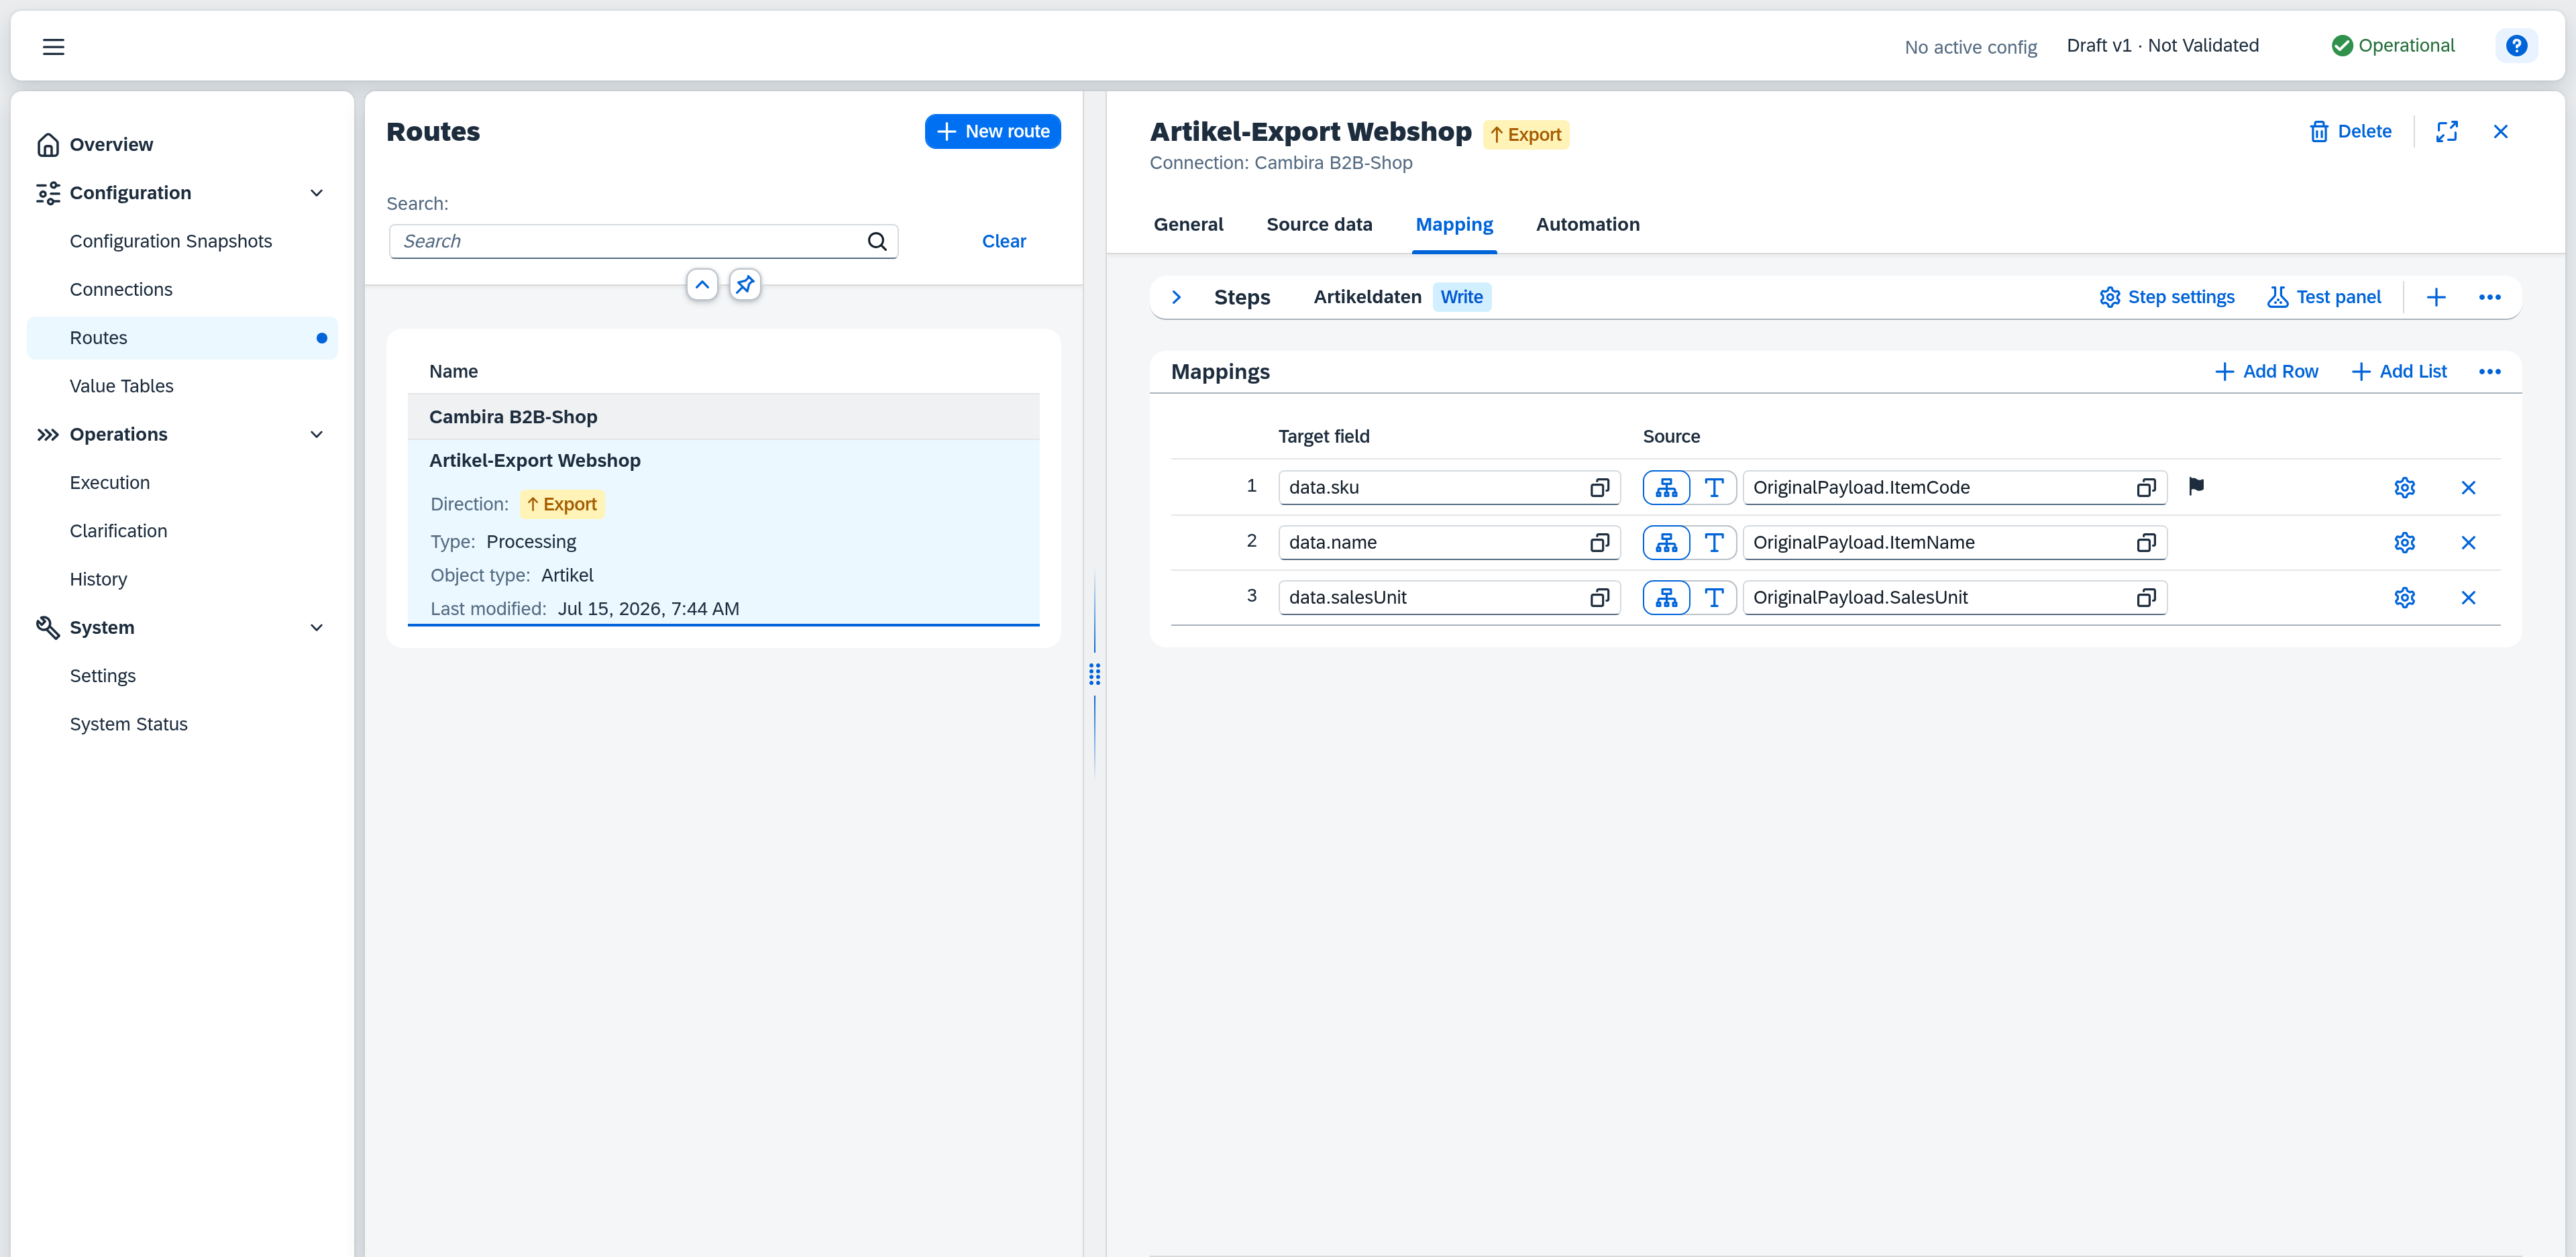
Details such as transformations or required fields are explained in the mapping reference.
Set the schedule
The last tab, Automation, determines when the route runs on its own. For a regular export you set up a trigger there:
- Next to Trigger, click the + (Add trigger).
- Choose Scheduled and click Select.
- Set the Frequency, e.g. Daily.
- Enter the Time via the time picker, e.g.
06:00. - Choose the Run type Incremental — Xchange then transfers only the changes since the last run on each pass, detected via the change filter from the source data. (Full transfers all data every time.)
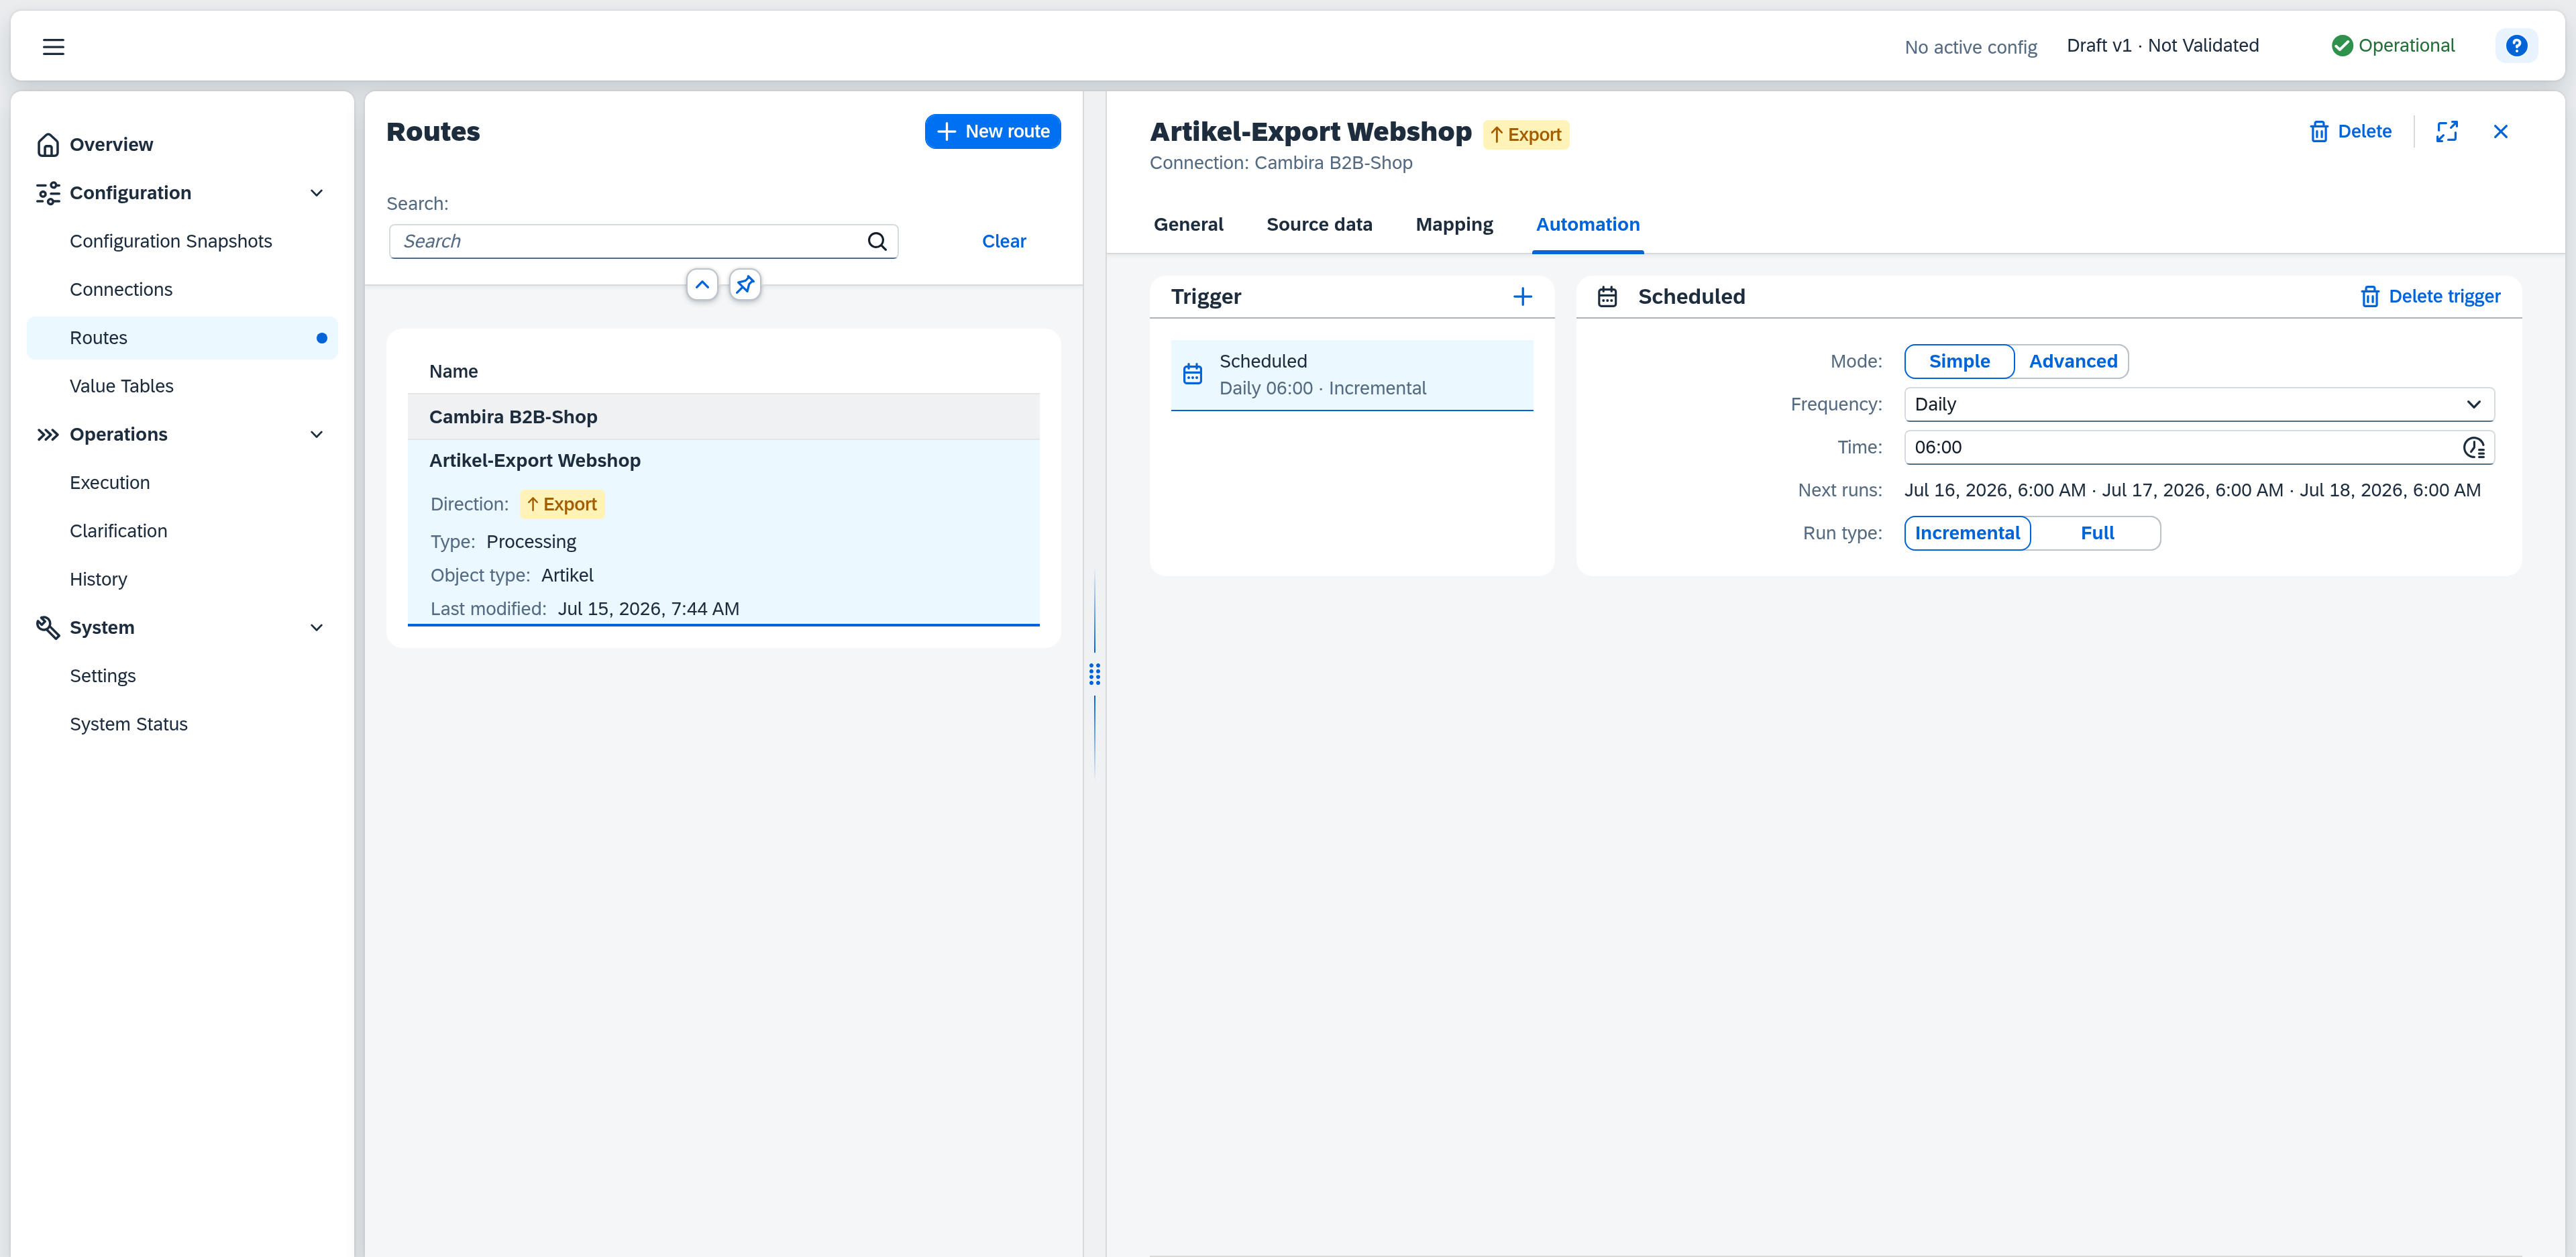
If you don't add a trigger, the route only runs when you start it by hand. Further trigger options are described in the guide Schedule a recurring sync.
Validate & activate
Now you validate and activate your draft:
- Switch to the Overview via the menu on the left — your entries are already saved thanks to automatic saving. It shows the note that a draft is waiting to be activated.
- Follow the link Open Configuration Snapshots. Validating and activating happen on the Configuration Snapshots page — you can also reach it directly via the menu on the left.
- In the draft area, click Validate. Xchange reports whether the draft is internally consistent. If some details are still incomplete, a list of clickable hints appears that take you straight to the affected spot.
- Once everything is green, click Activate and confirm in the dialog.
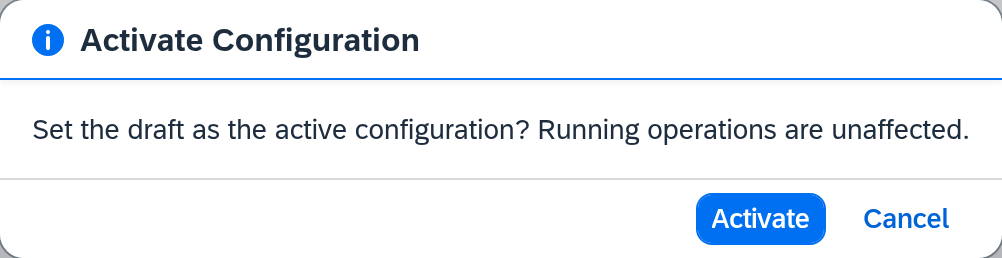
The full procedure is described in the guide Activating configuration changes.
Switch on automation
An activated draft alone does not make the route run yet: new routes start out Paused, so nothing starts unintentionally. To make your schedule take effect, switch automation on:
- Open the Execution page on the left.
- Find your route in the list and set its Automation switch to Active.
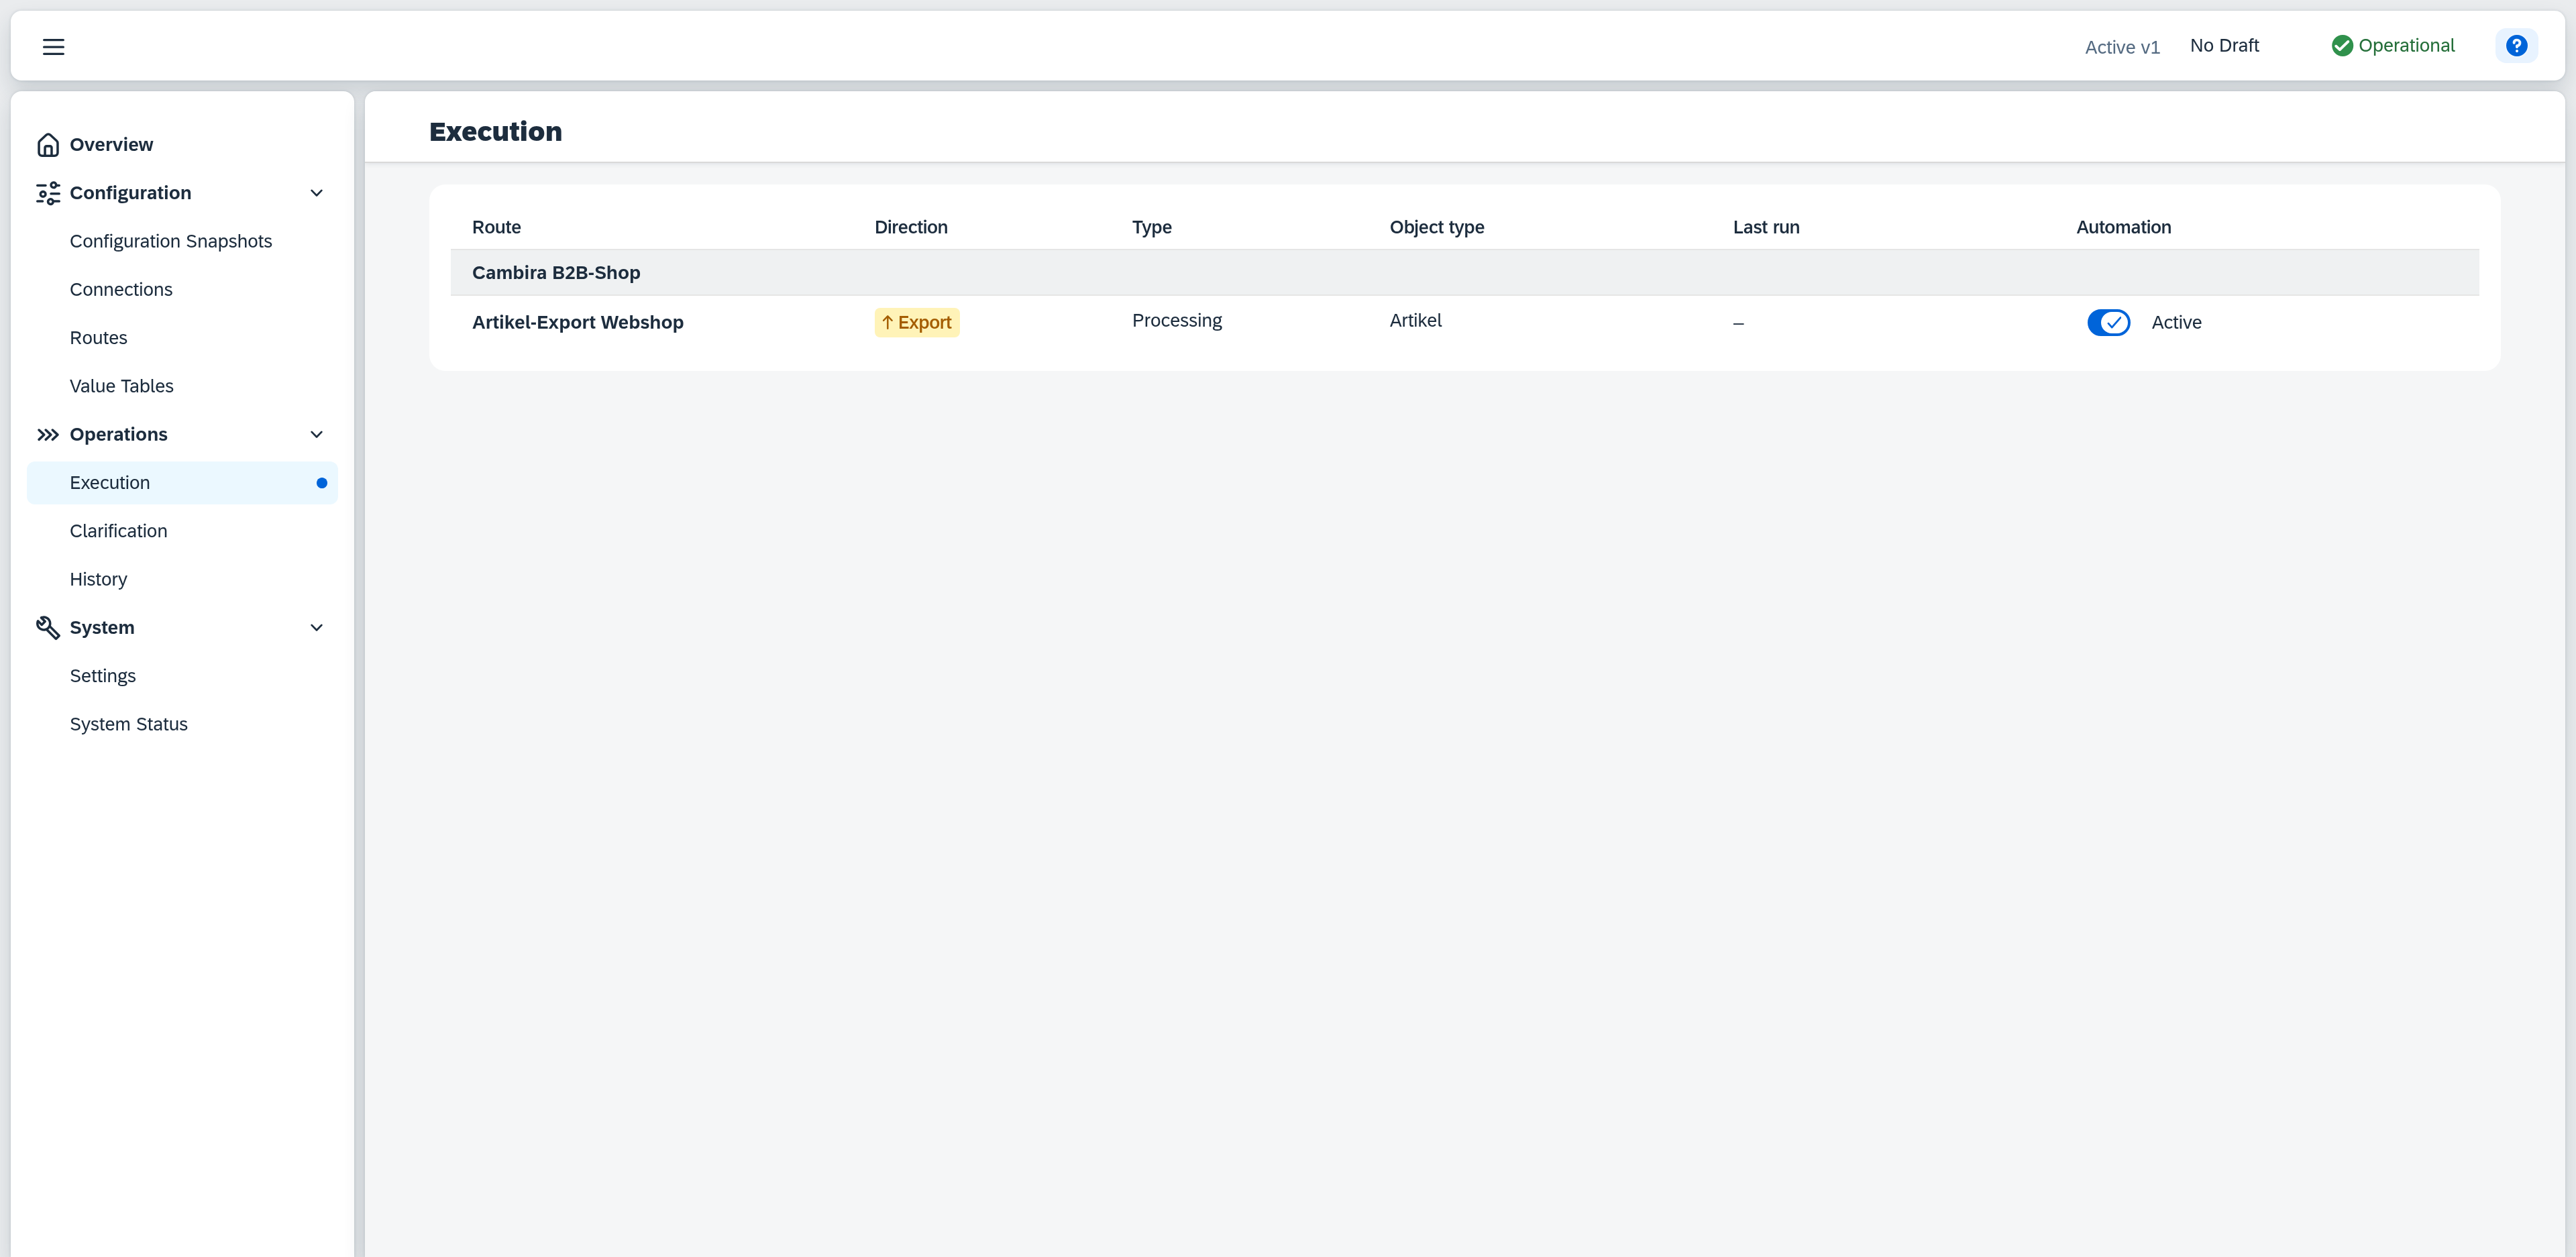
From now on the route runs on its own at the set time. More on this — such as combining several triggers — is in the guide Schedule a recurring sync.
Running! How do I know it worked?
Done — your route is active and switched on. So you don't have to wait until the set time, start the first run by hand right away:
- On the Execution page, click your route — the detail view opens on the right.
- Click Start run. In the dialog, choose the Run type and confirm with Start. For this first test, best pick Full — that guarantees all items are transferred and you see a result right away.
Here's how you see it worked:
- An entry with the result of the transfer appears in the History. Right after starting, the Open in history action takes you there.
- On the Overview it says Nothing to clarify, and the active configuration snapshot now contains your route.
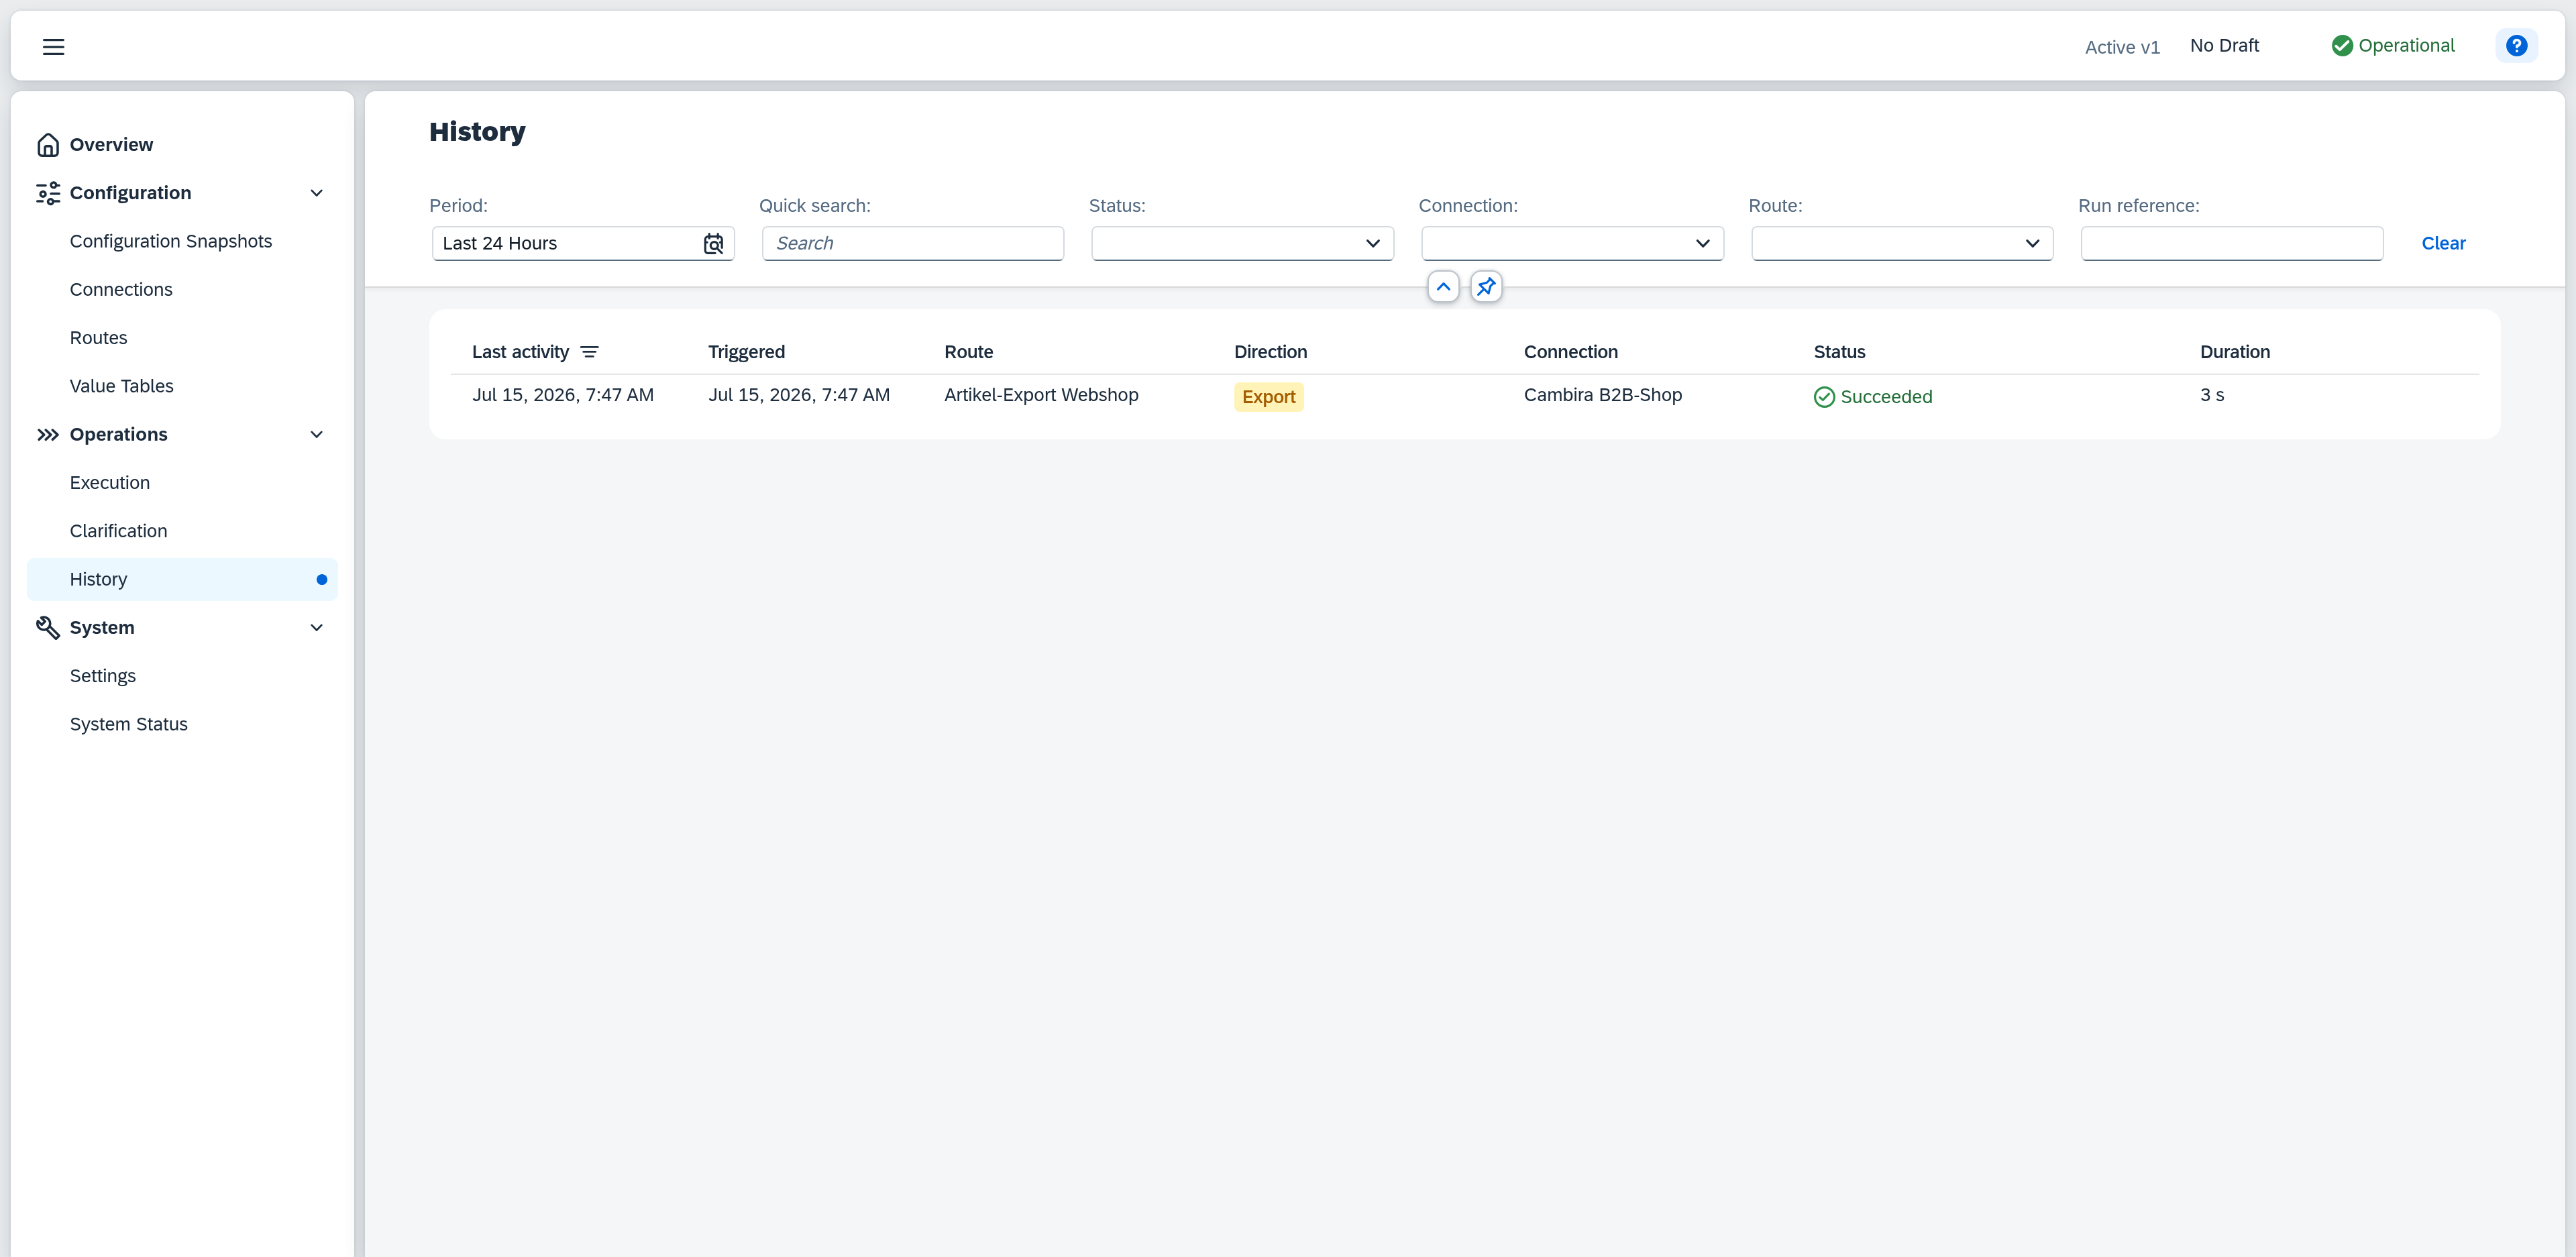
The history is explained in the history reference, the overview in the overview reference.
What comes next
You have run through the complete arc once — create, configure, activate, and switch on. The tasks you meet day to day are collected under Working with Xchange.