Create a mapping
The mapping is the heart of a route: it defines which source field is mapped onto which target field. This guide walks through creating a mapping — from the empty tab to a tested mapping. As an example, we export articles from SAP Business One to a web shop.
For an export route the source is SAP Business One and the target is the external system; for an import route it is the other way around. The editor has the same structure in both cases — this guide uses the export as its running example. Every detail is covered by the Mapping reference.
What you need
An existing route (see Create a route) with defined source data. Open the route and switch to the Mapping tab in the editor.
Add a step
A mapping is organized into steps; each step produces its own target document with its own mappings. For the simple case, one step is enough.
- In the step bar, click Add Step.
- Enter a name, e.g.
Article export. - Open the step settings and, on the General tab, enter the Target Path — the location in the target document where this step's fields land, e.g.
products.
If it is the route's only step, it automatically becomes the primary step — the step that forms the leading target document.
Map the fields
There are two ways to create mapping rows: automatically from reference data (recommended) or by hand.
Generate from reference data (recommended)
Instead of creating every field individually, let Xchange derive the fields from a sample message:
- Open the step settings and switch to the Target structure tab.
- Paste reference data there — a sample message from the target system (for an import, a structure skeleton from the SAP Business One field structure instead).
- Click Generate mappings. Xchange takes the contained fields, lists, and list fields as new mapping rows; existing mappings are left unchanged. A confirmation states how many rows were newly created. If that creates a large number of rows at once, Xchange asks first and states the number; to create fewer, trim the target structure.
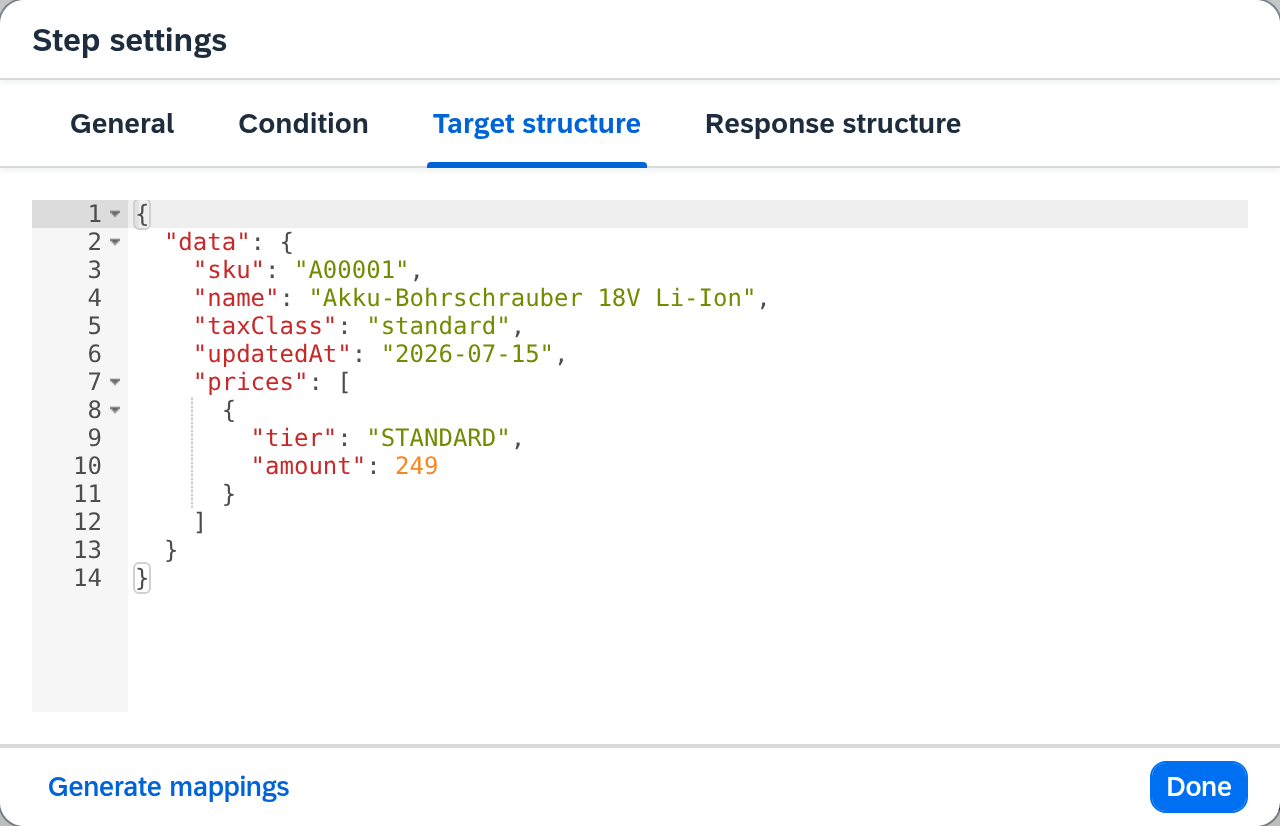
Afterwards you refine the generated rows as described below — check the source, and add a transformation or empty behavior where needed.
Create by hand
For individual fields — or when no reference data is available — you create rows directly:
- Click Add Row — an empty mapping row appears.
- Choose the Target field — the location in the target document to be filled, e.g.
data.sku. The row moves to its place in the list as you do: mappings sharing a path prefix stay together. - Leave the Source type on Path (the default) — so the value comes from a source field. With Constant you enter a fixed value instead.
- Choose the Source — the field whose value is transferred, e.g. the article number.
Repeat for each further field. Each row needs at least a target field and a source.
Refine a mapping
The gear icon of a row opens its Field Details. There you control how — and whether — the value is transferred:
- Transformation — reshape the source value before transfer, e.g. Convert to decimal, Format date, or Value table (look up a target value in a value table). Without a transformation the value is transferred unchanged.
- If source value is empty — what happens when the source yields no value: Do not transfer, Use fallback value, or Write null.
- Condition — governs the whole row: if it does not hold, the mapping is skipped and the target field is left out of the message.
- Required — whether the row must have a value (Technical or Business) for the message to count as complete.
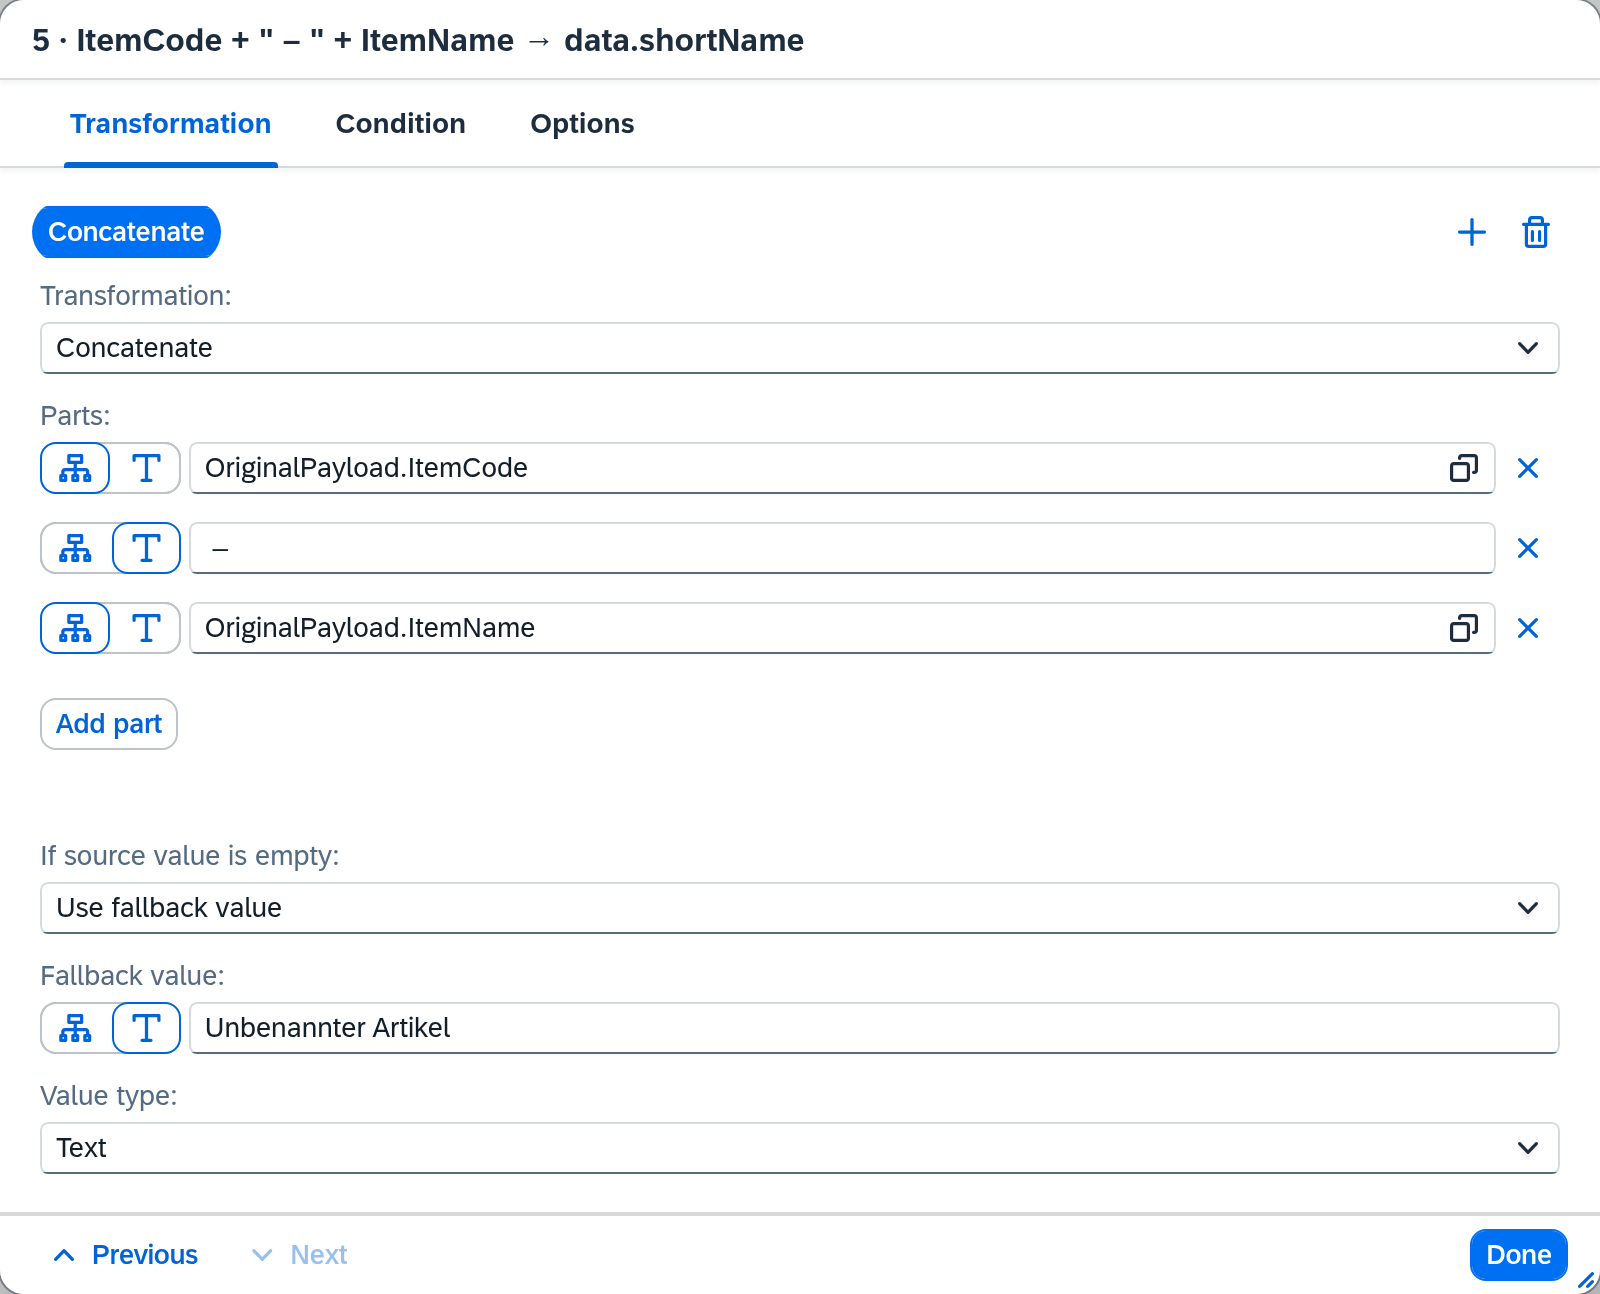
The full list of transformations and options is in the Mapping reference.
Test the mapping
Before you activate the route, check the mapping in the Test panel — without processing a real message and without writing to the target system:
- In the toolbar, click Test panel.
- Under Test message, paste an example in JSON format or load it from the source data.
- Click Run test. Under Result, the mapped message appears as JSON. If a mapping fails, Xchange marks the affected row.
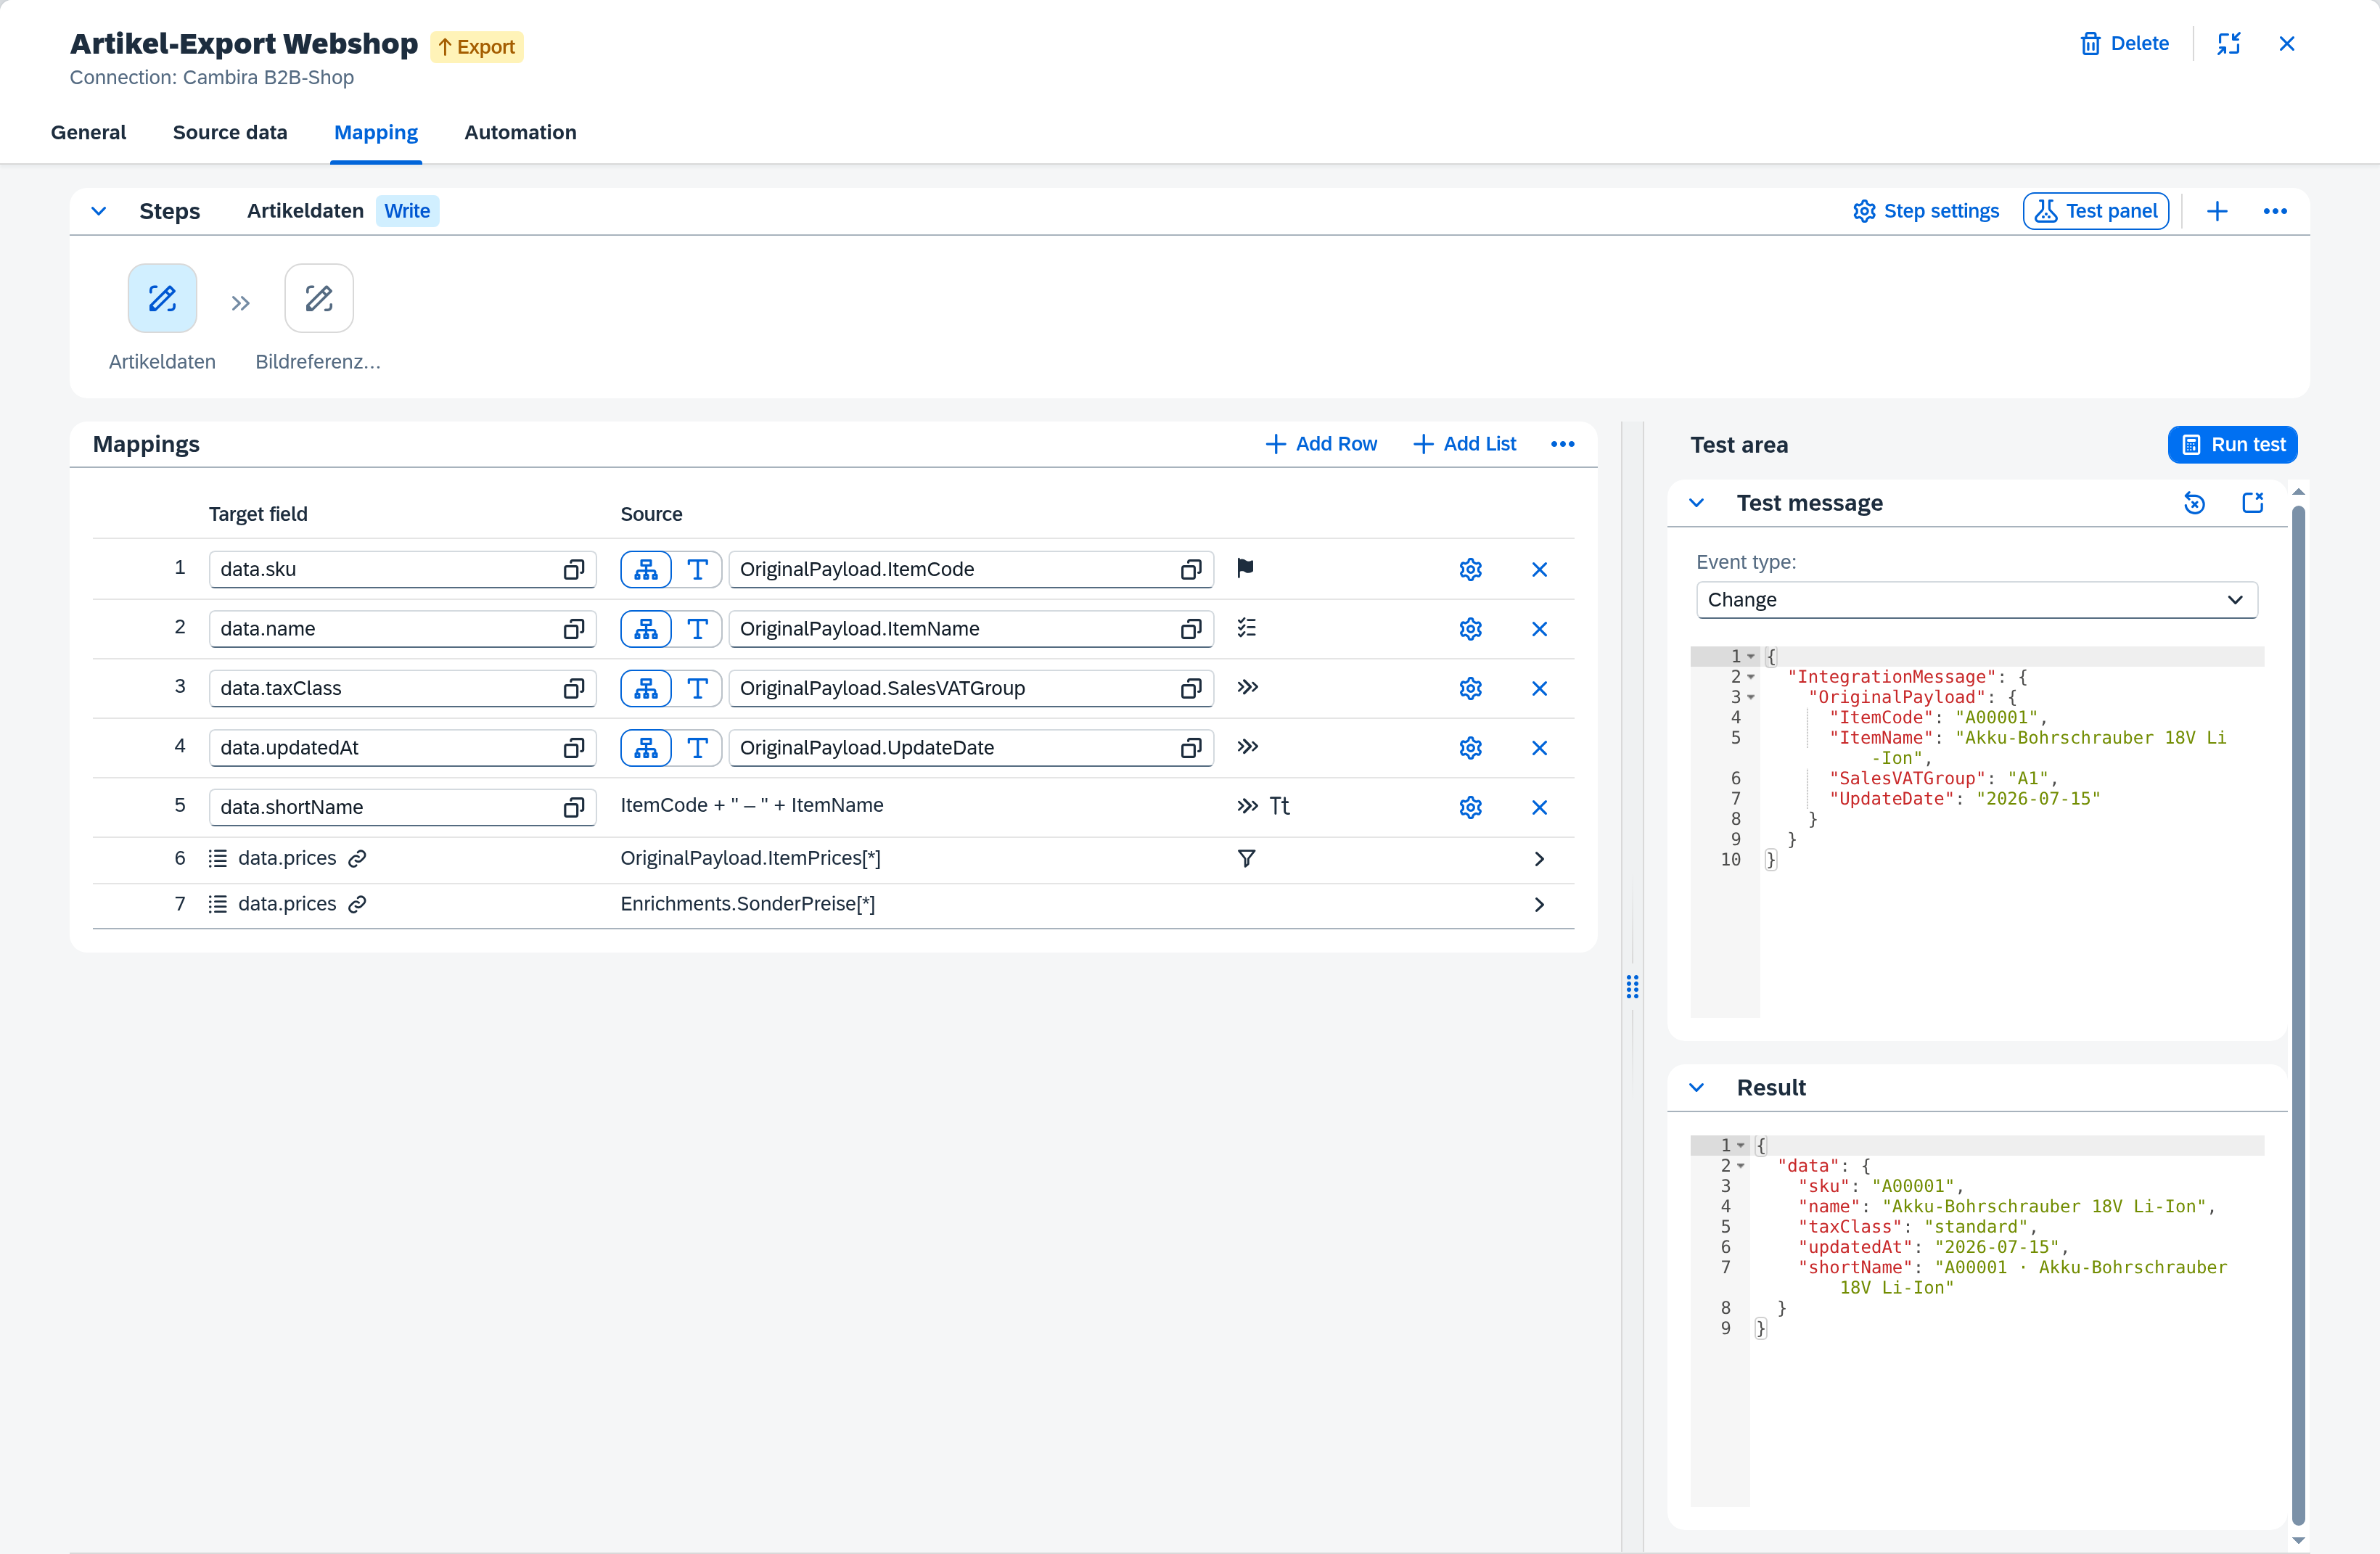
If you change a mapping afterwards, the Outdated — run test again marker indicates that the displayed result no longer matches the current configuration.
More options
For structured data, the mapping also offers:
- Lists — recurring elements (e.g. price tiers) with their own filter; several source lists can be merged into one target list.
- Lists from a text value — when the source holds the list as one field with a separator (
4711|4712|4713), Xchange splits the value and turns each part into a list element. - Additional rows — fixed entries that appear alongside the derived list elements, optionally tied to a condition.
All three are described in detail in the Mapping reference.
Activate
The mapping takes effect only when you activate the draft:
- Go to the Overview and follow the Open Configuration Snapshots link — validating and activating happen there.
- In the draft area, click Validate.
- Once everything is green, click Activate and confirm in the dialog.
The full flow is described in the guide Activate configuration changes.